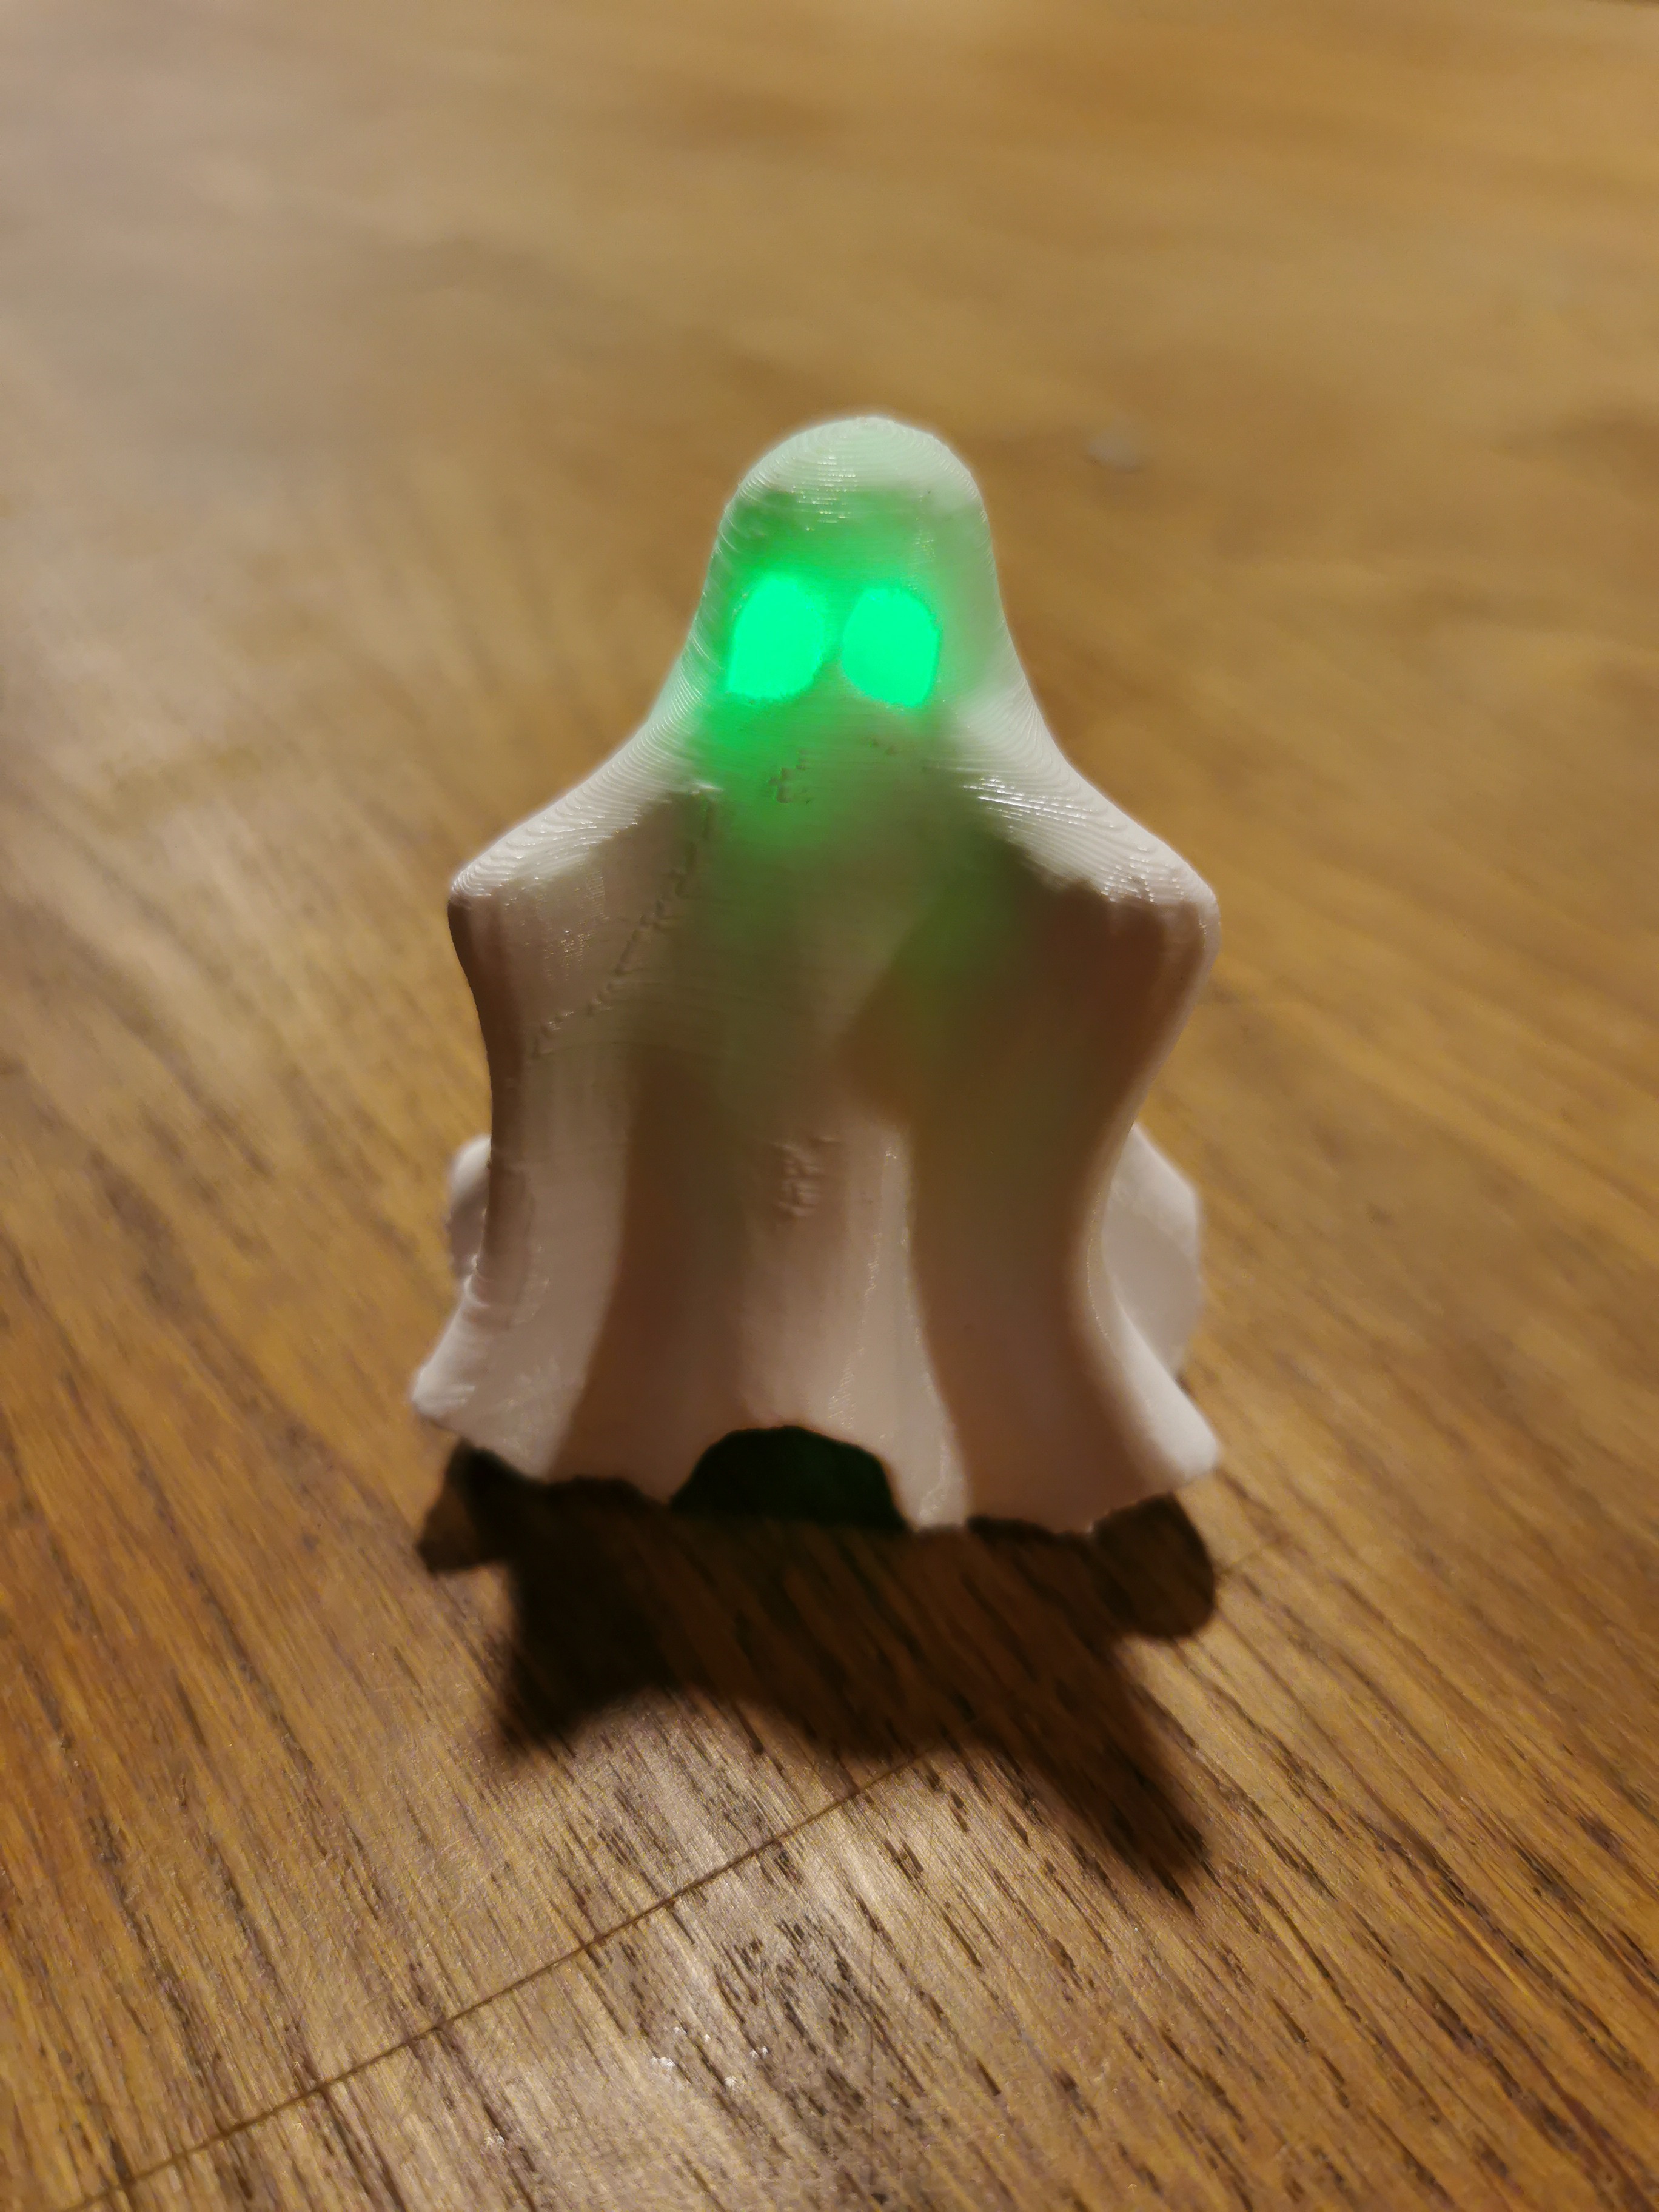
Make a light shy ghost for Halloween 10/26/2021
Make your own light shy ghost for Halloween.
1) Print out the ghost
3D print the "Cute hug me ghost" by gCreate from Thingiverse.
Recommended settings:
- 0.15 mm layer height
- Brim
- Can print with or without support
2) Collect all the components
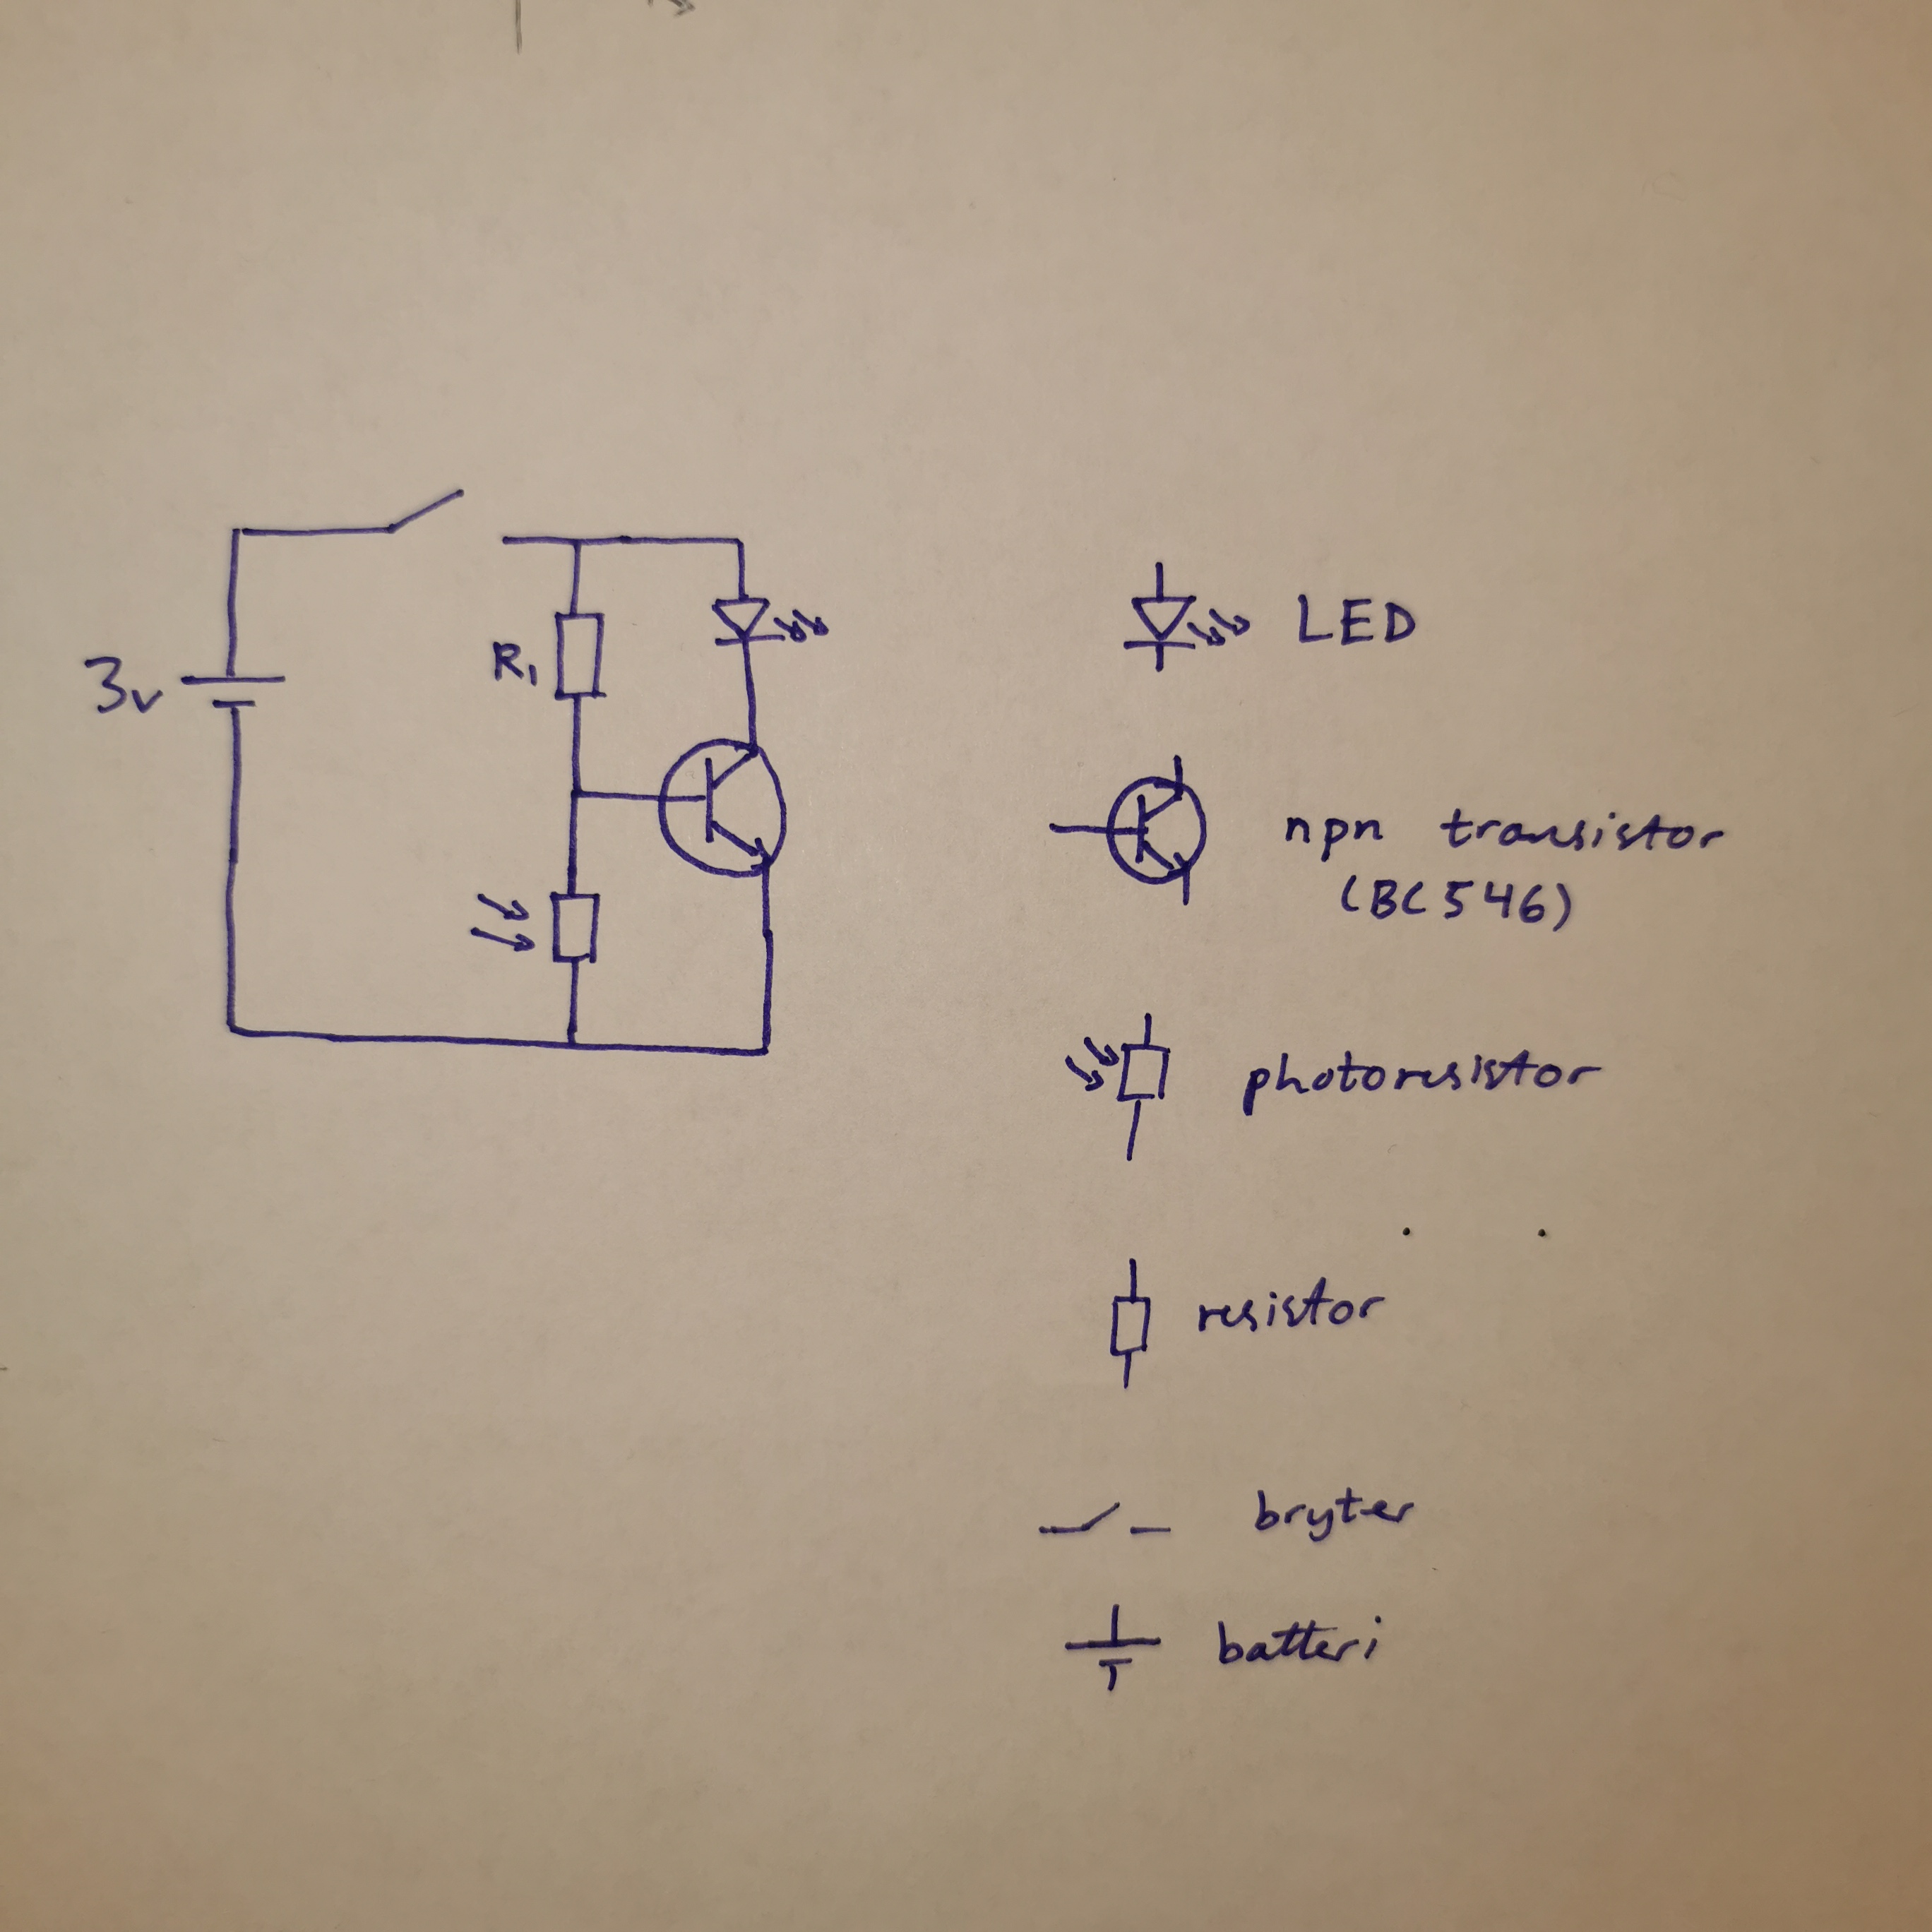
- 1x NPN transistor (eg. BC546)
- 1x photoresistor
- 1x LED
- 1x slide switch
- 1x 3 V battery (eg. CR2032)
- 1x 3 V battery holder
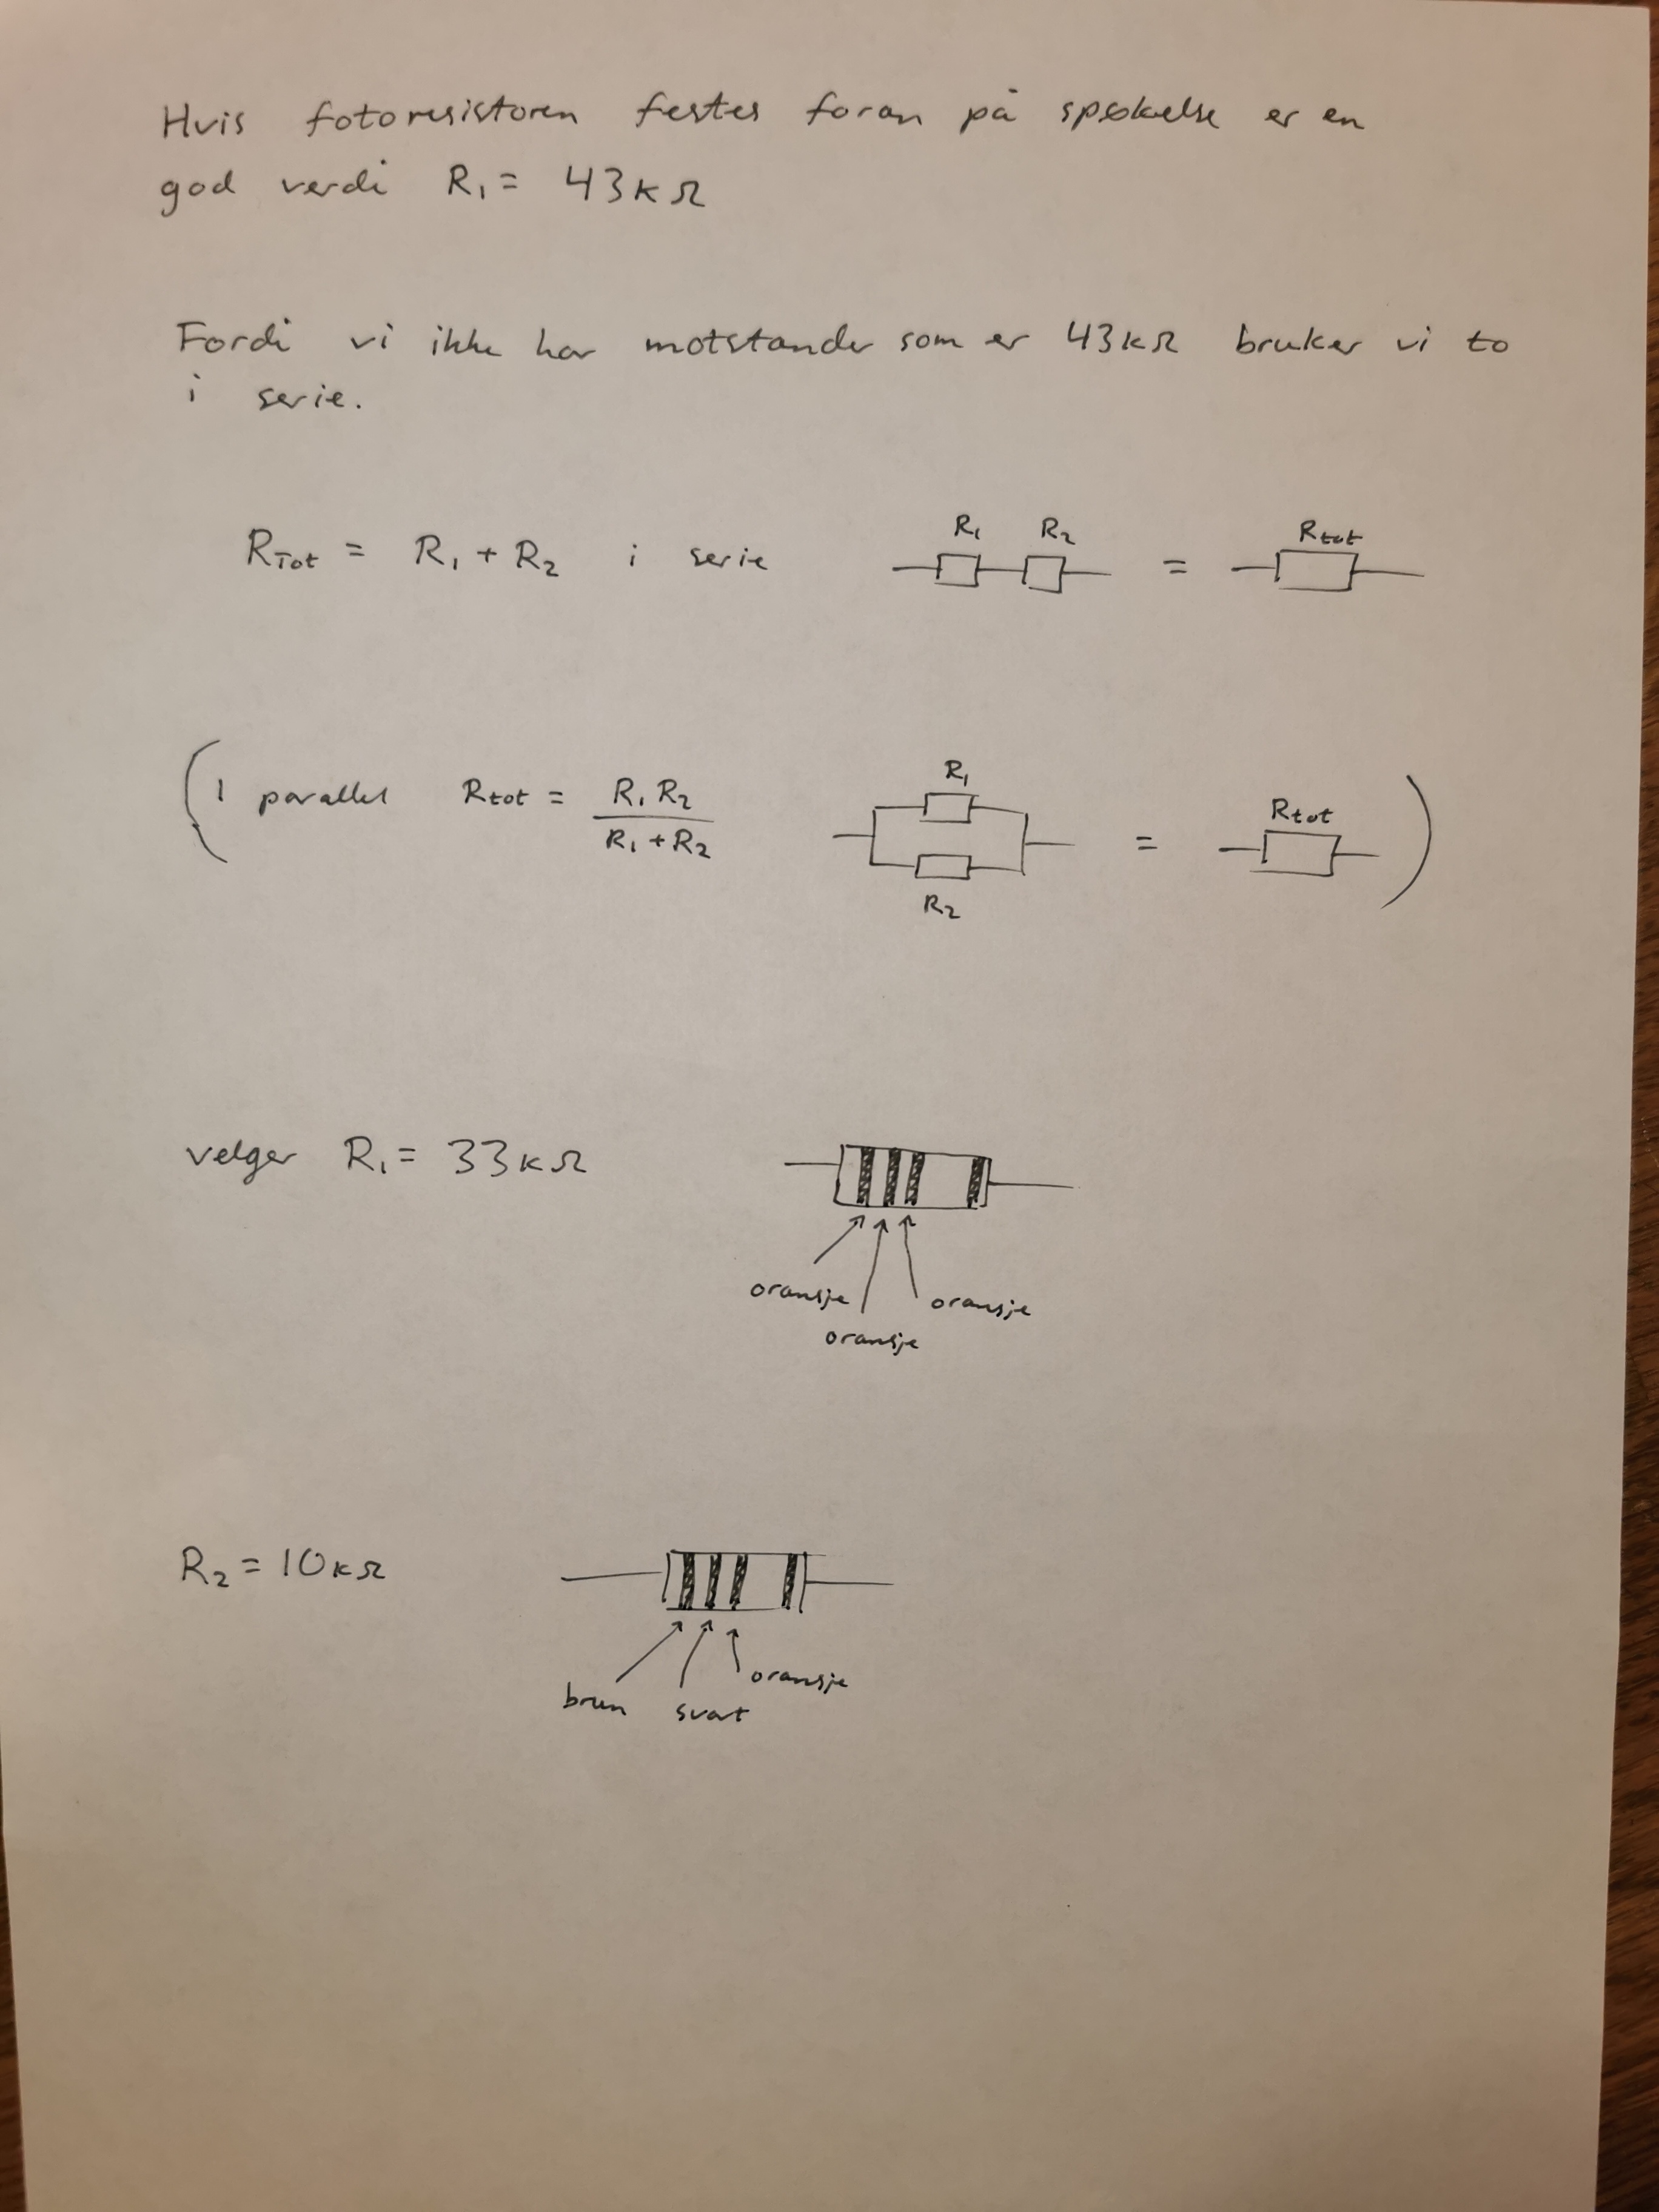
- 1x 33 kΩ resistor (colour code: orange-orange-orange)
- 1x 10 kΩ resistor (colour code: brown-black-orange)
- 1x protoboard (minimum 5x6 size)
At NTNU you can easily buy all the electronic components from Omega Verkstedet for a few NOK.
Available at Makerverkstedet
- 3D printer
- Soldering iron
- Glue (suggest hot glue)
- A few cm of wire to connect the battery holder to the rest of the circuit
3) Connect the components
If you don't know anything about circuits you can ignore the circuit diagram and just look at how the components are physically placed and connected on the protoboard.
Circuit diagram:
Position on protoboard
Suggested position of all the components (seen from above):
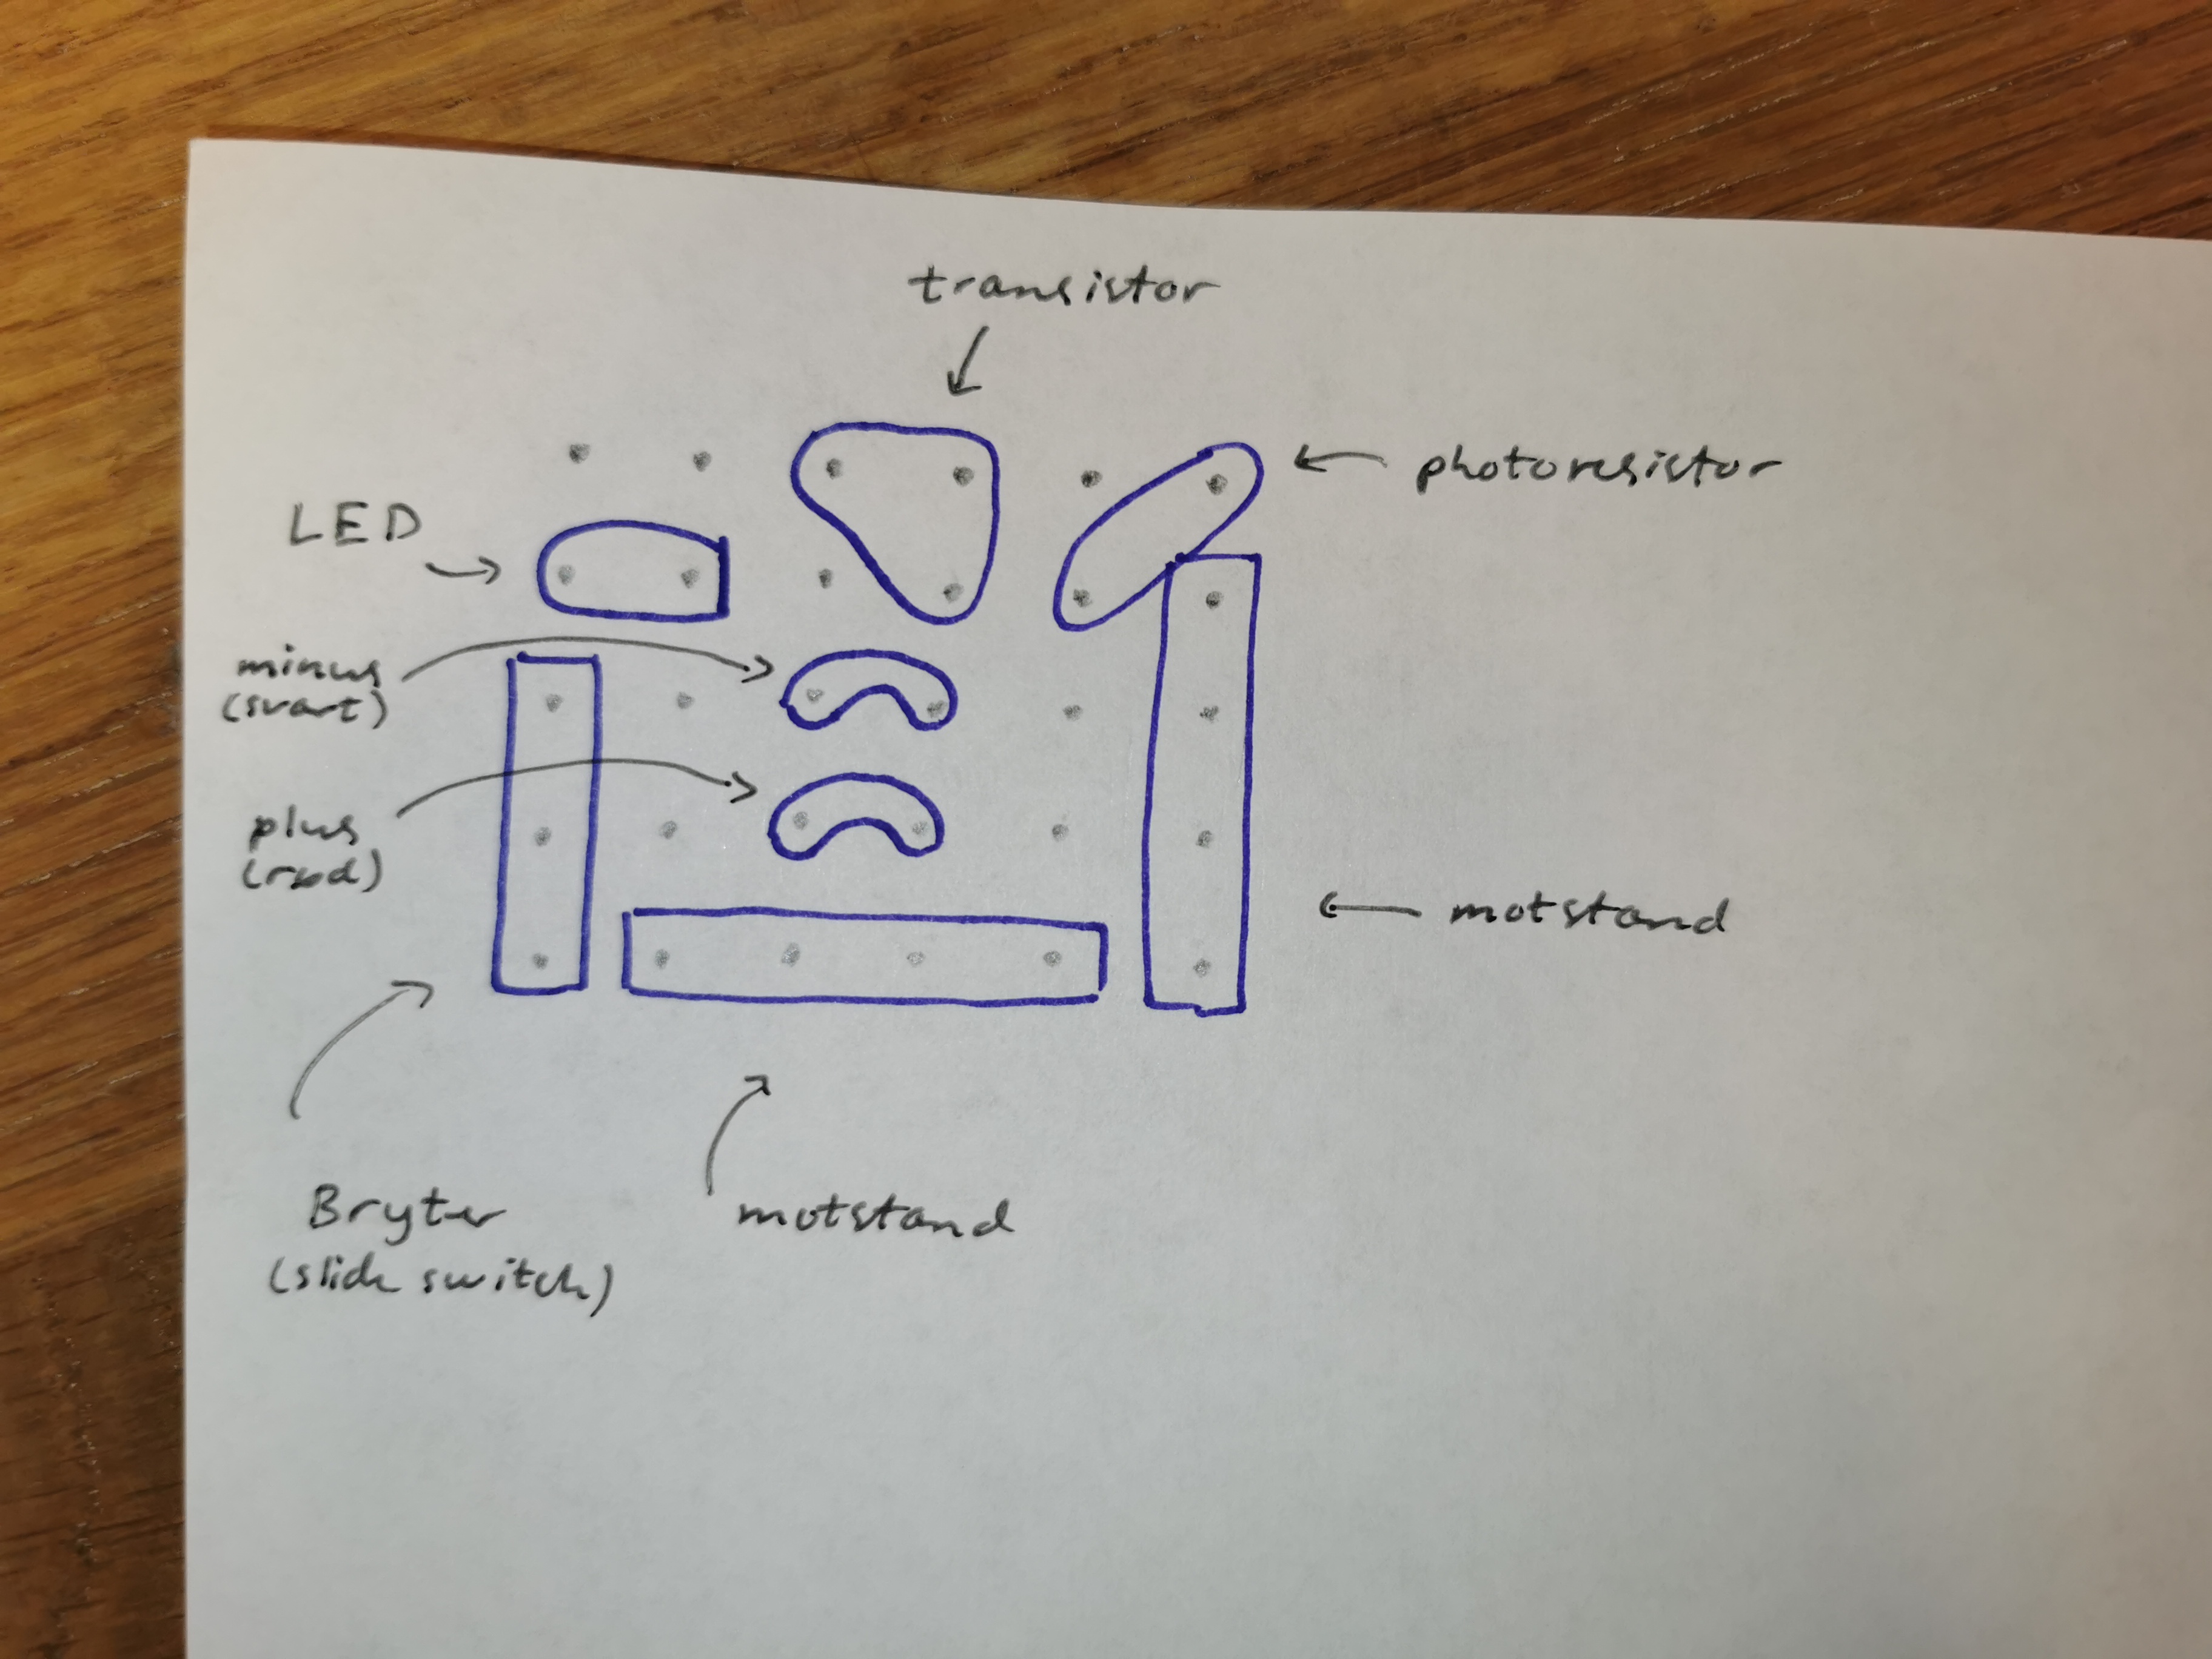
More details about the orientation of the components:
The only components that can be connected incorrectly are the LED, transistor and +/- from the battery. The other componets don't have a specific orientation. The two resistors ("motstand 1" and "motstand 2") can be interchanged.
Push the wire through the holes in the protoboard (to get a sturdier connection), then solder them or just solder them in place if they are too thick.
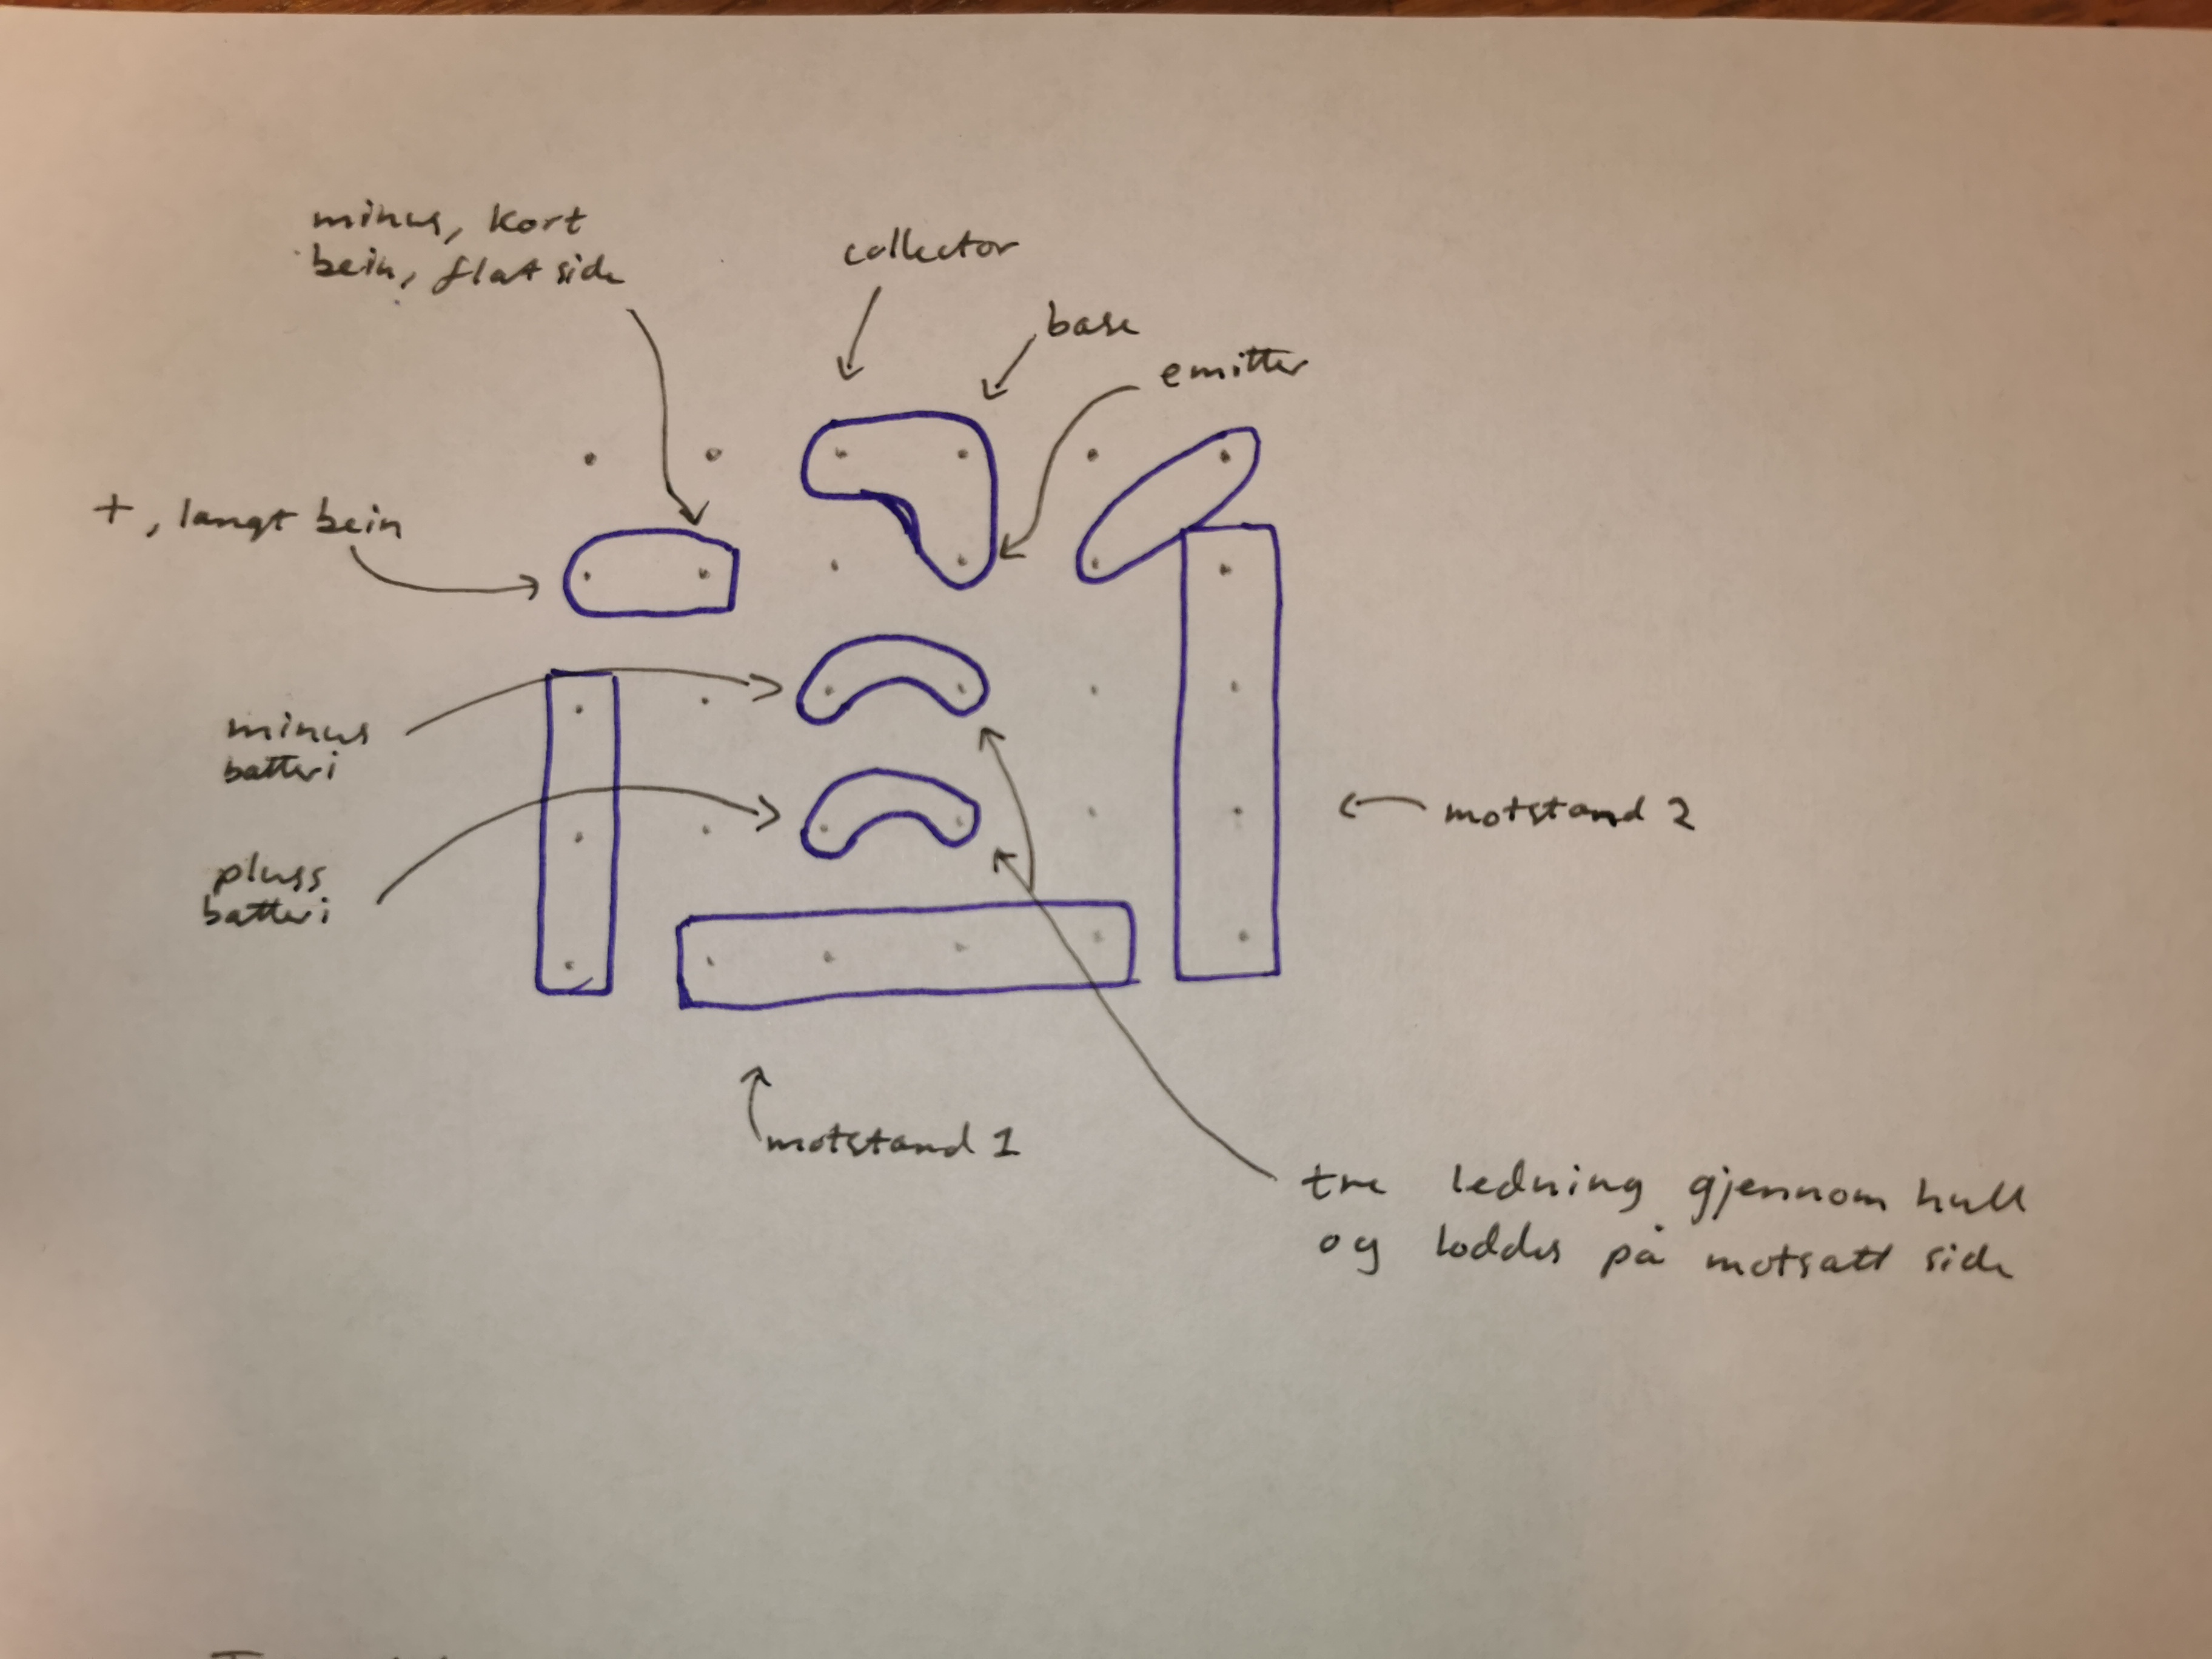
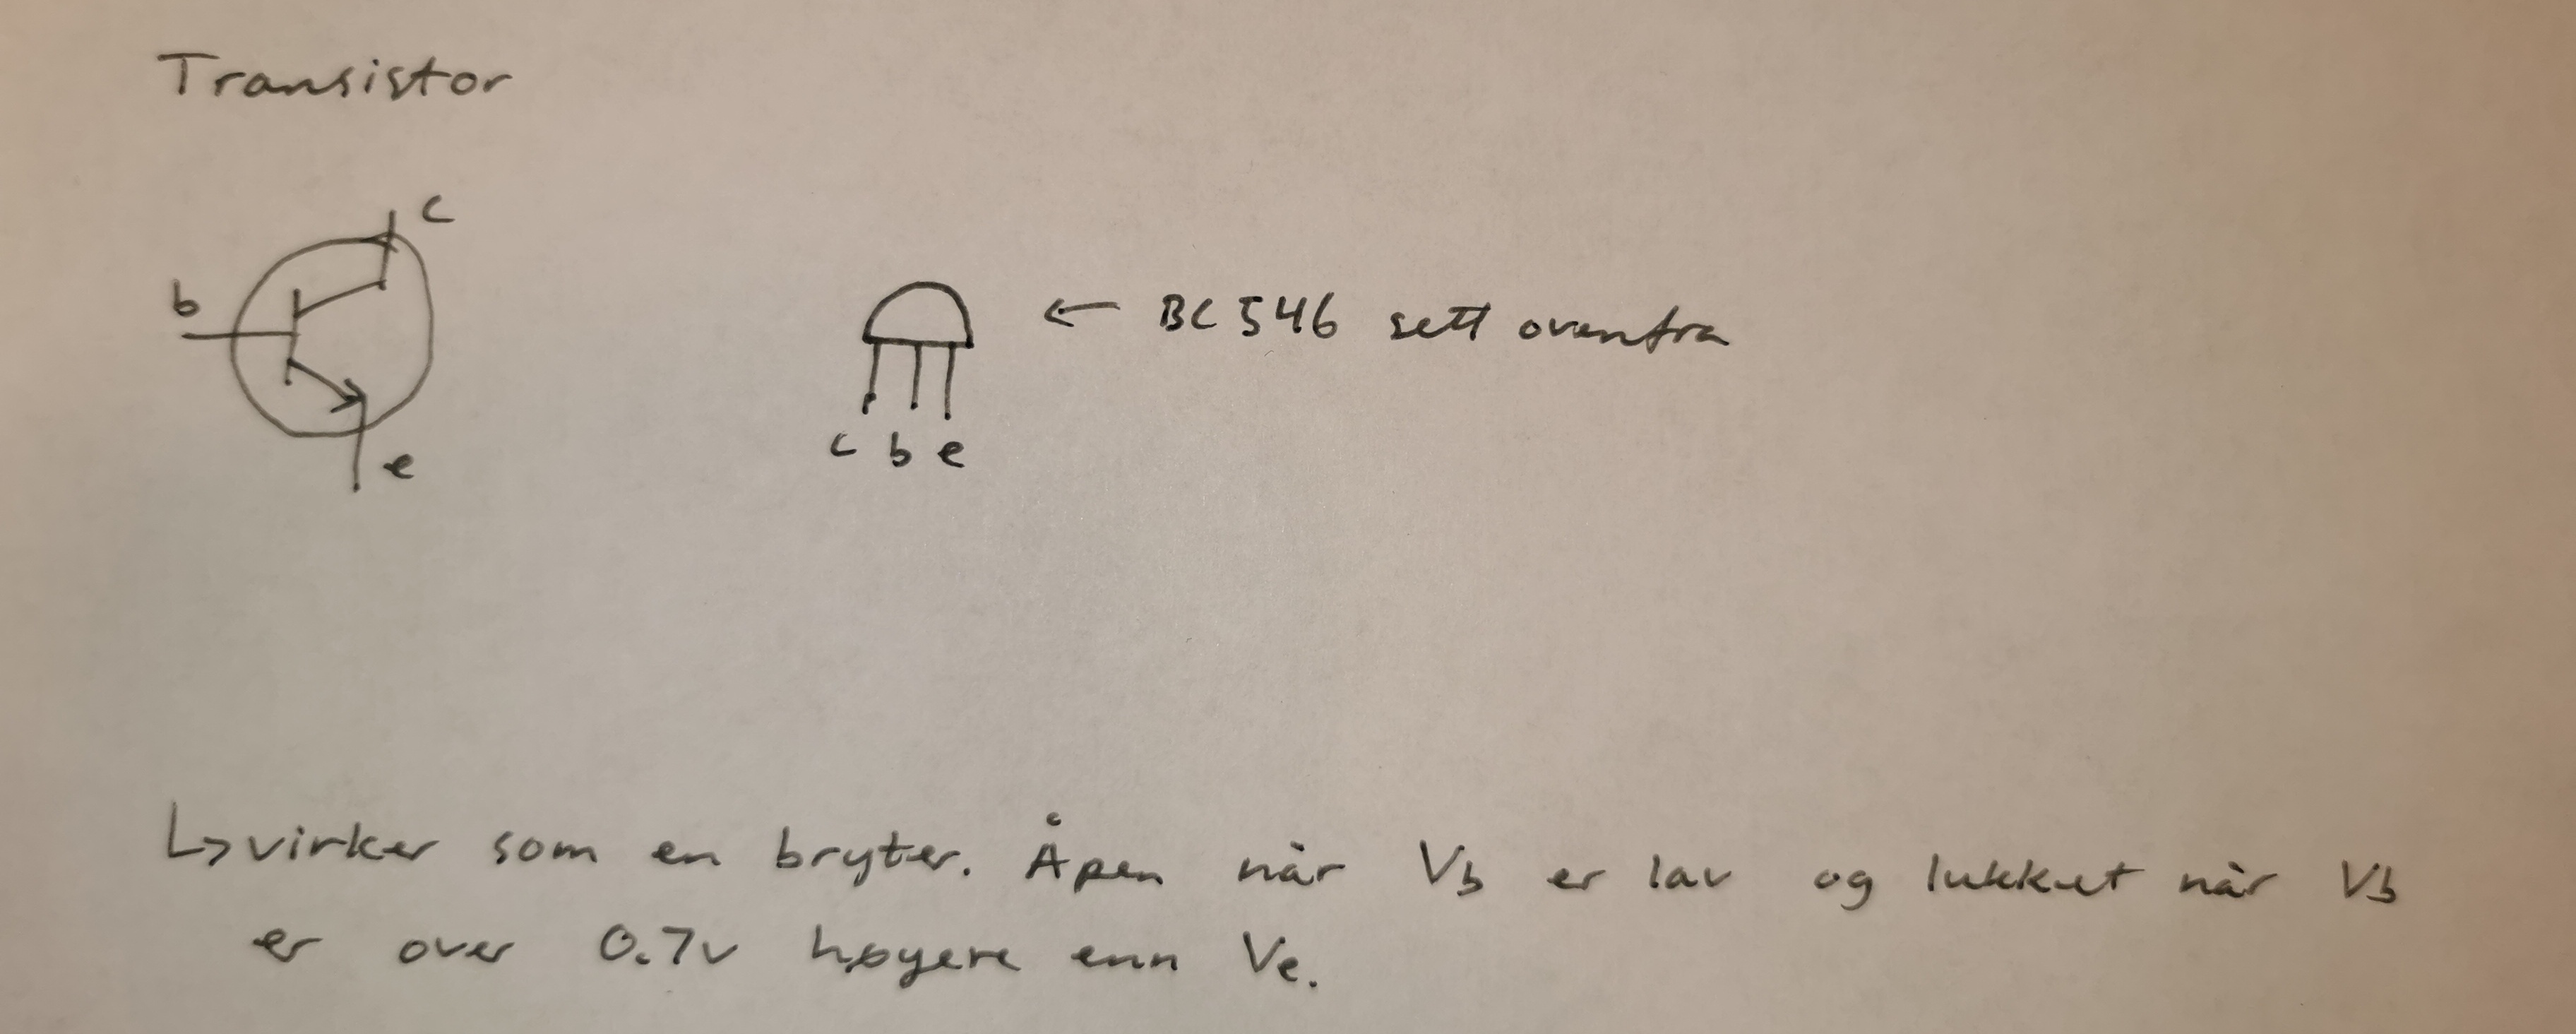
How the transistor is orientated:
For BC546: If you hold it so that the flat side is towards you the legs are collector, base, emitter.
NB: Other NTN transistors may have the legs in a different order. Google "datasheet [transistor name]" and look at the correct leg order for your transistor.
4) Solder the components together
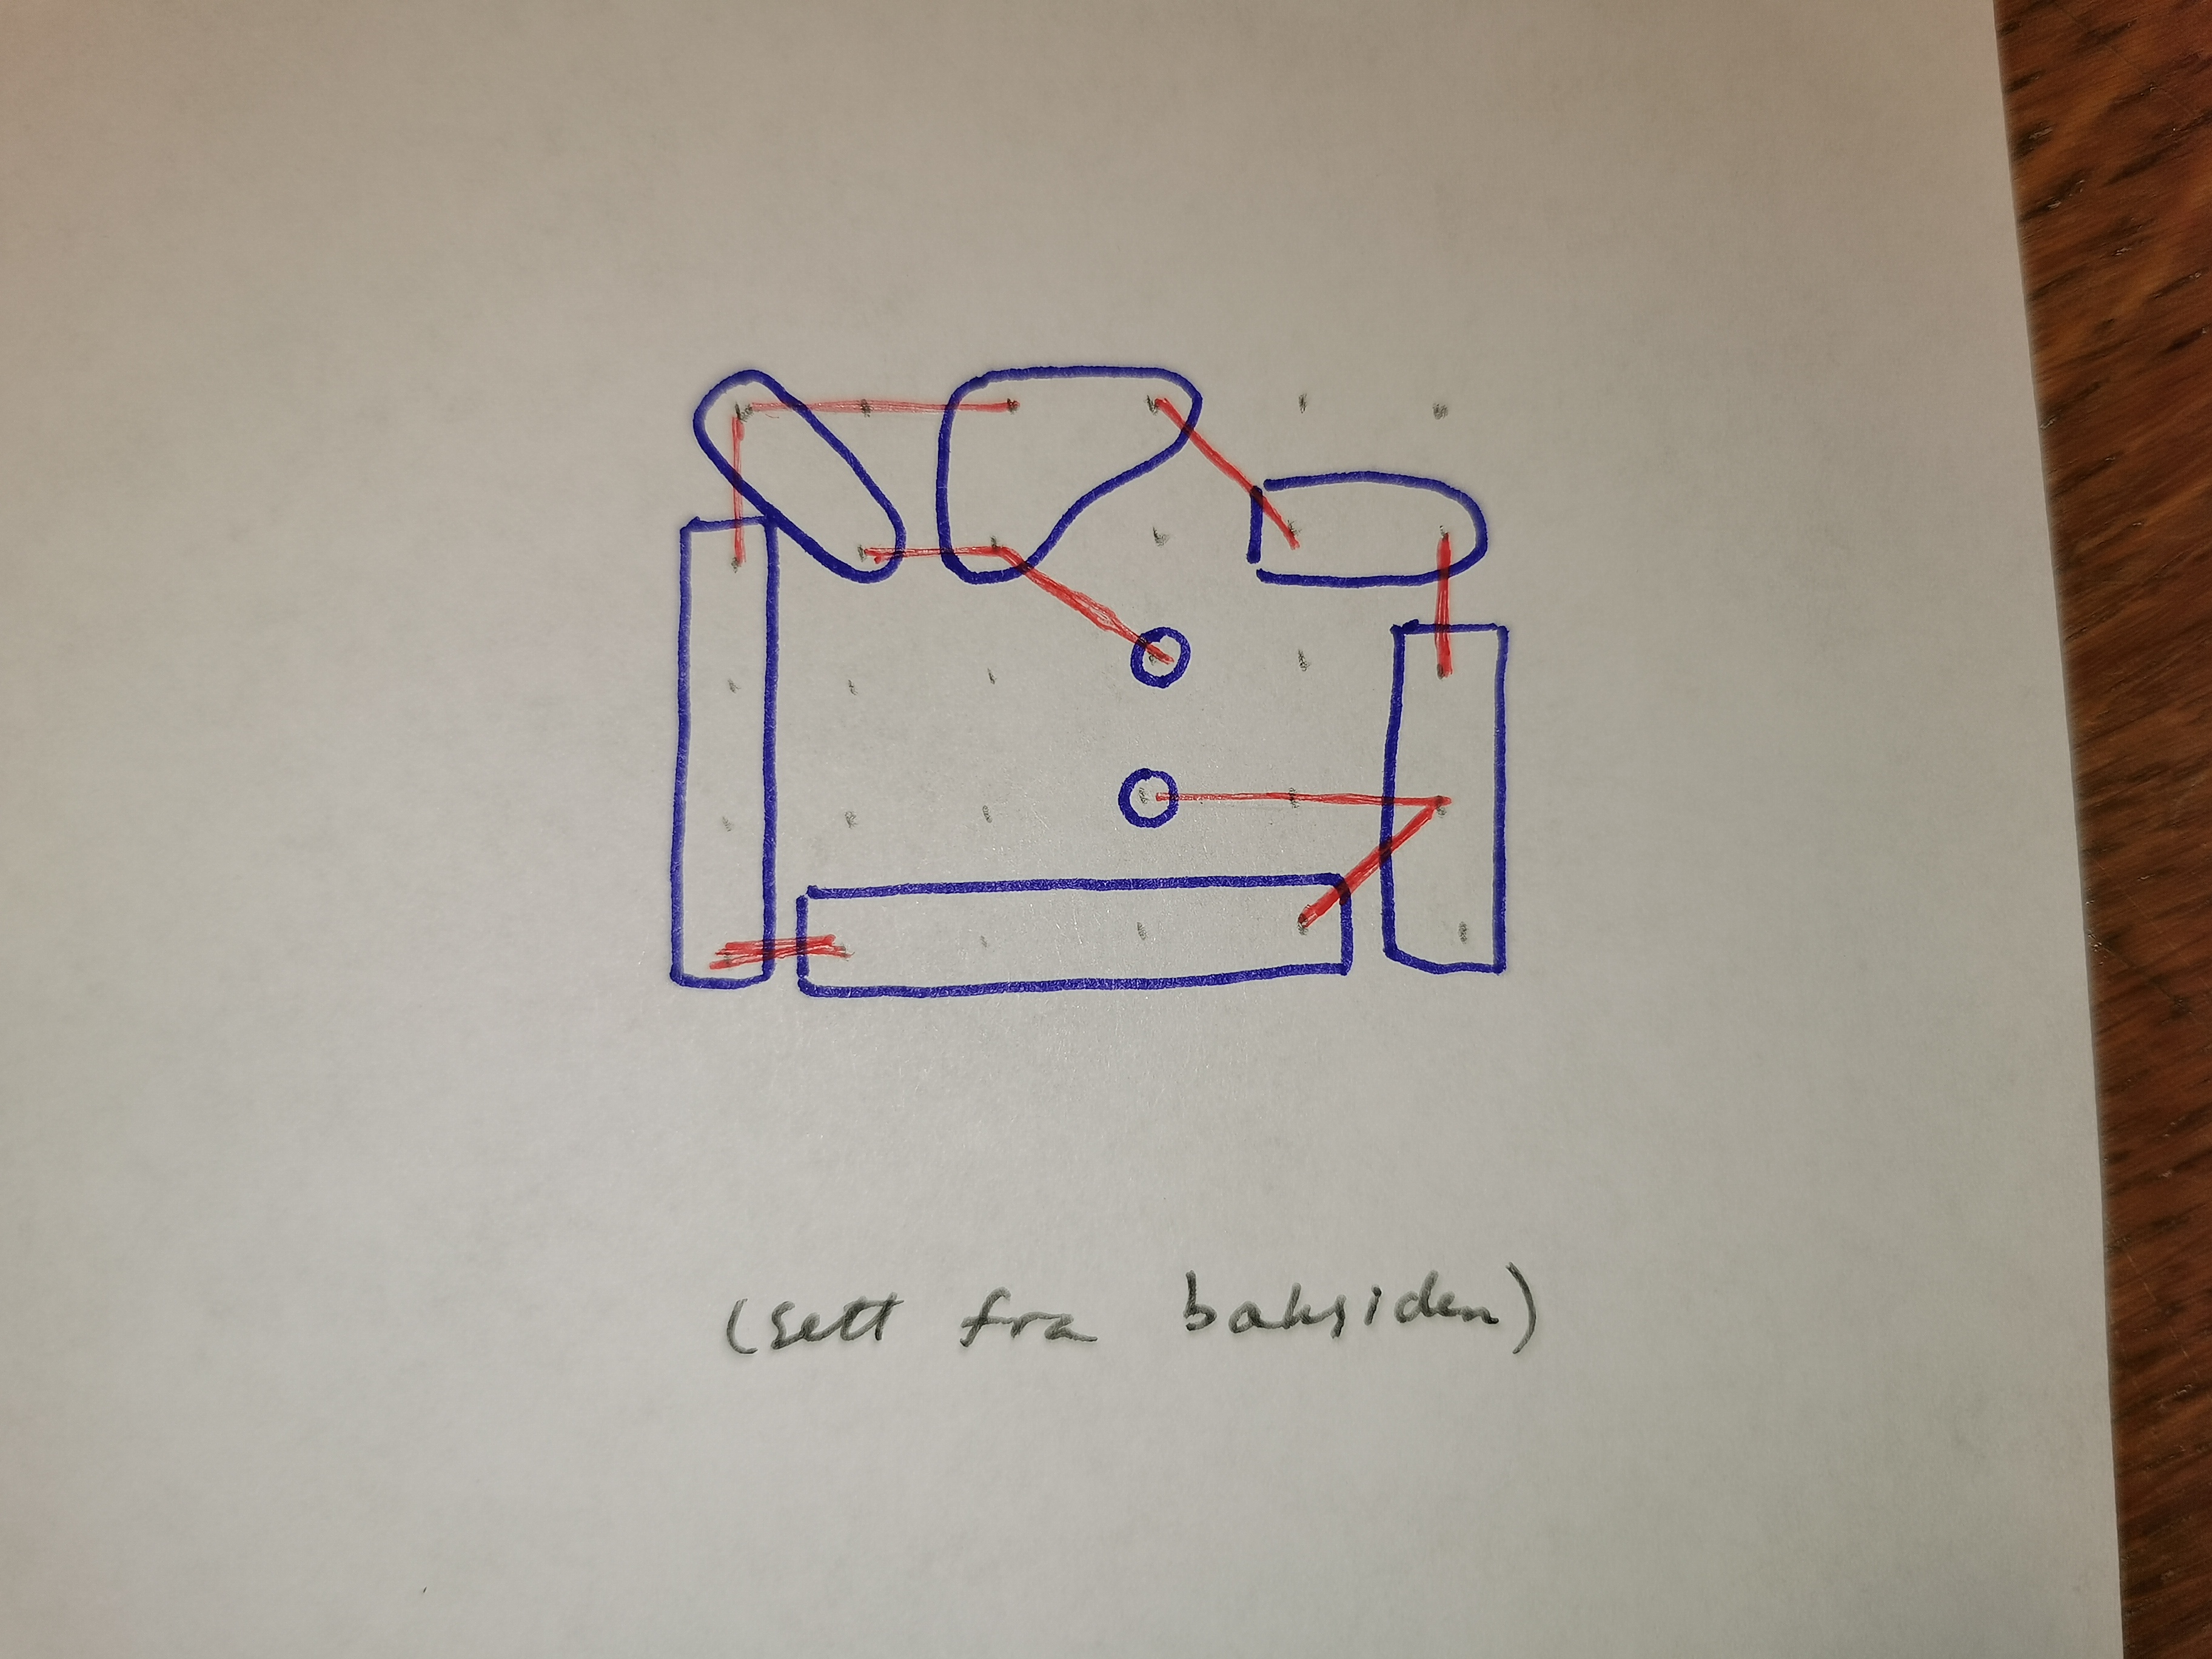
How to connect the components together (equivalent with circuit diagram):
If you have a large protoboard it should be cut so that it fits inside the ghost.
It is recommended to solder the LED and photoresistor so that they stick out from the board as much as possible. This way it is easier to install the protoboard and get the light and photoresistor at the correct position.
NB: This is seen from above and soldering is done on the back.

Mirrored diagram showing how to solder the parts together when seen from below (while soldering):
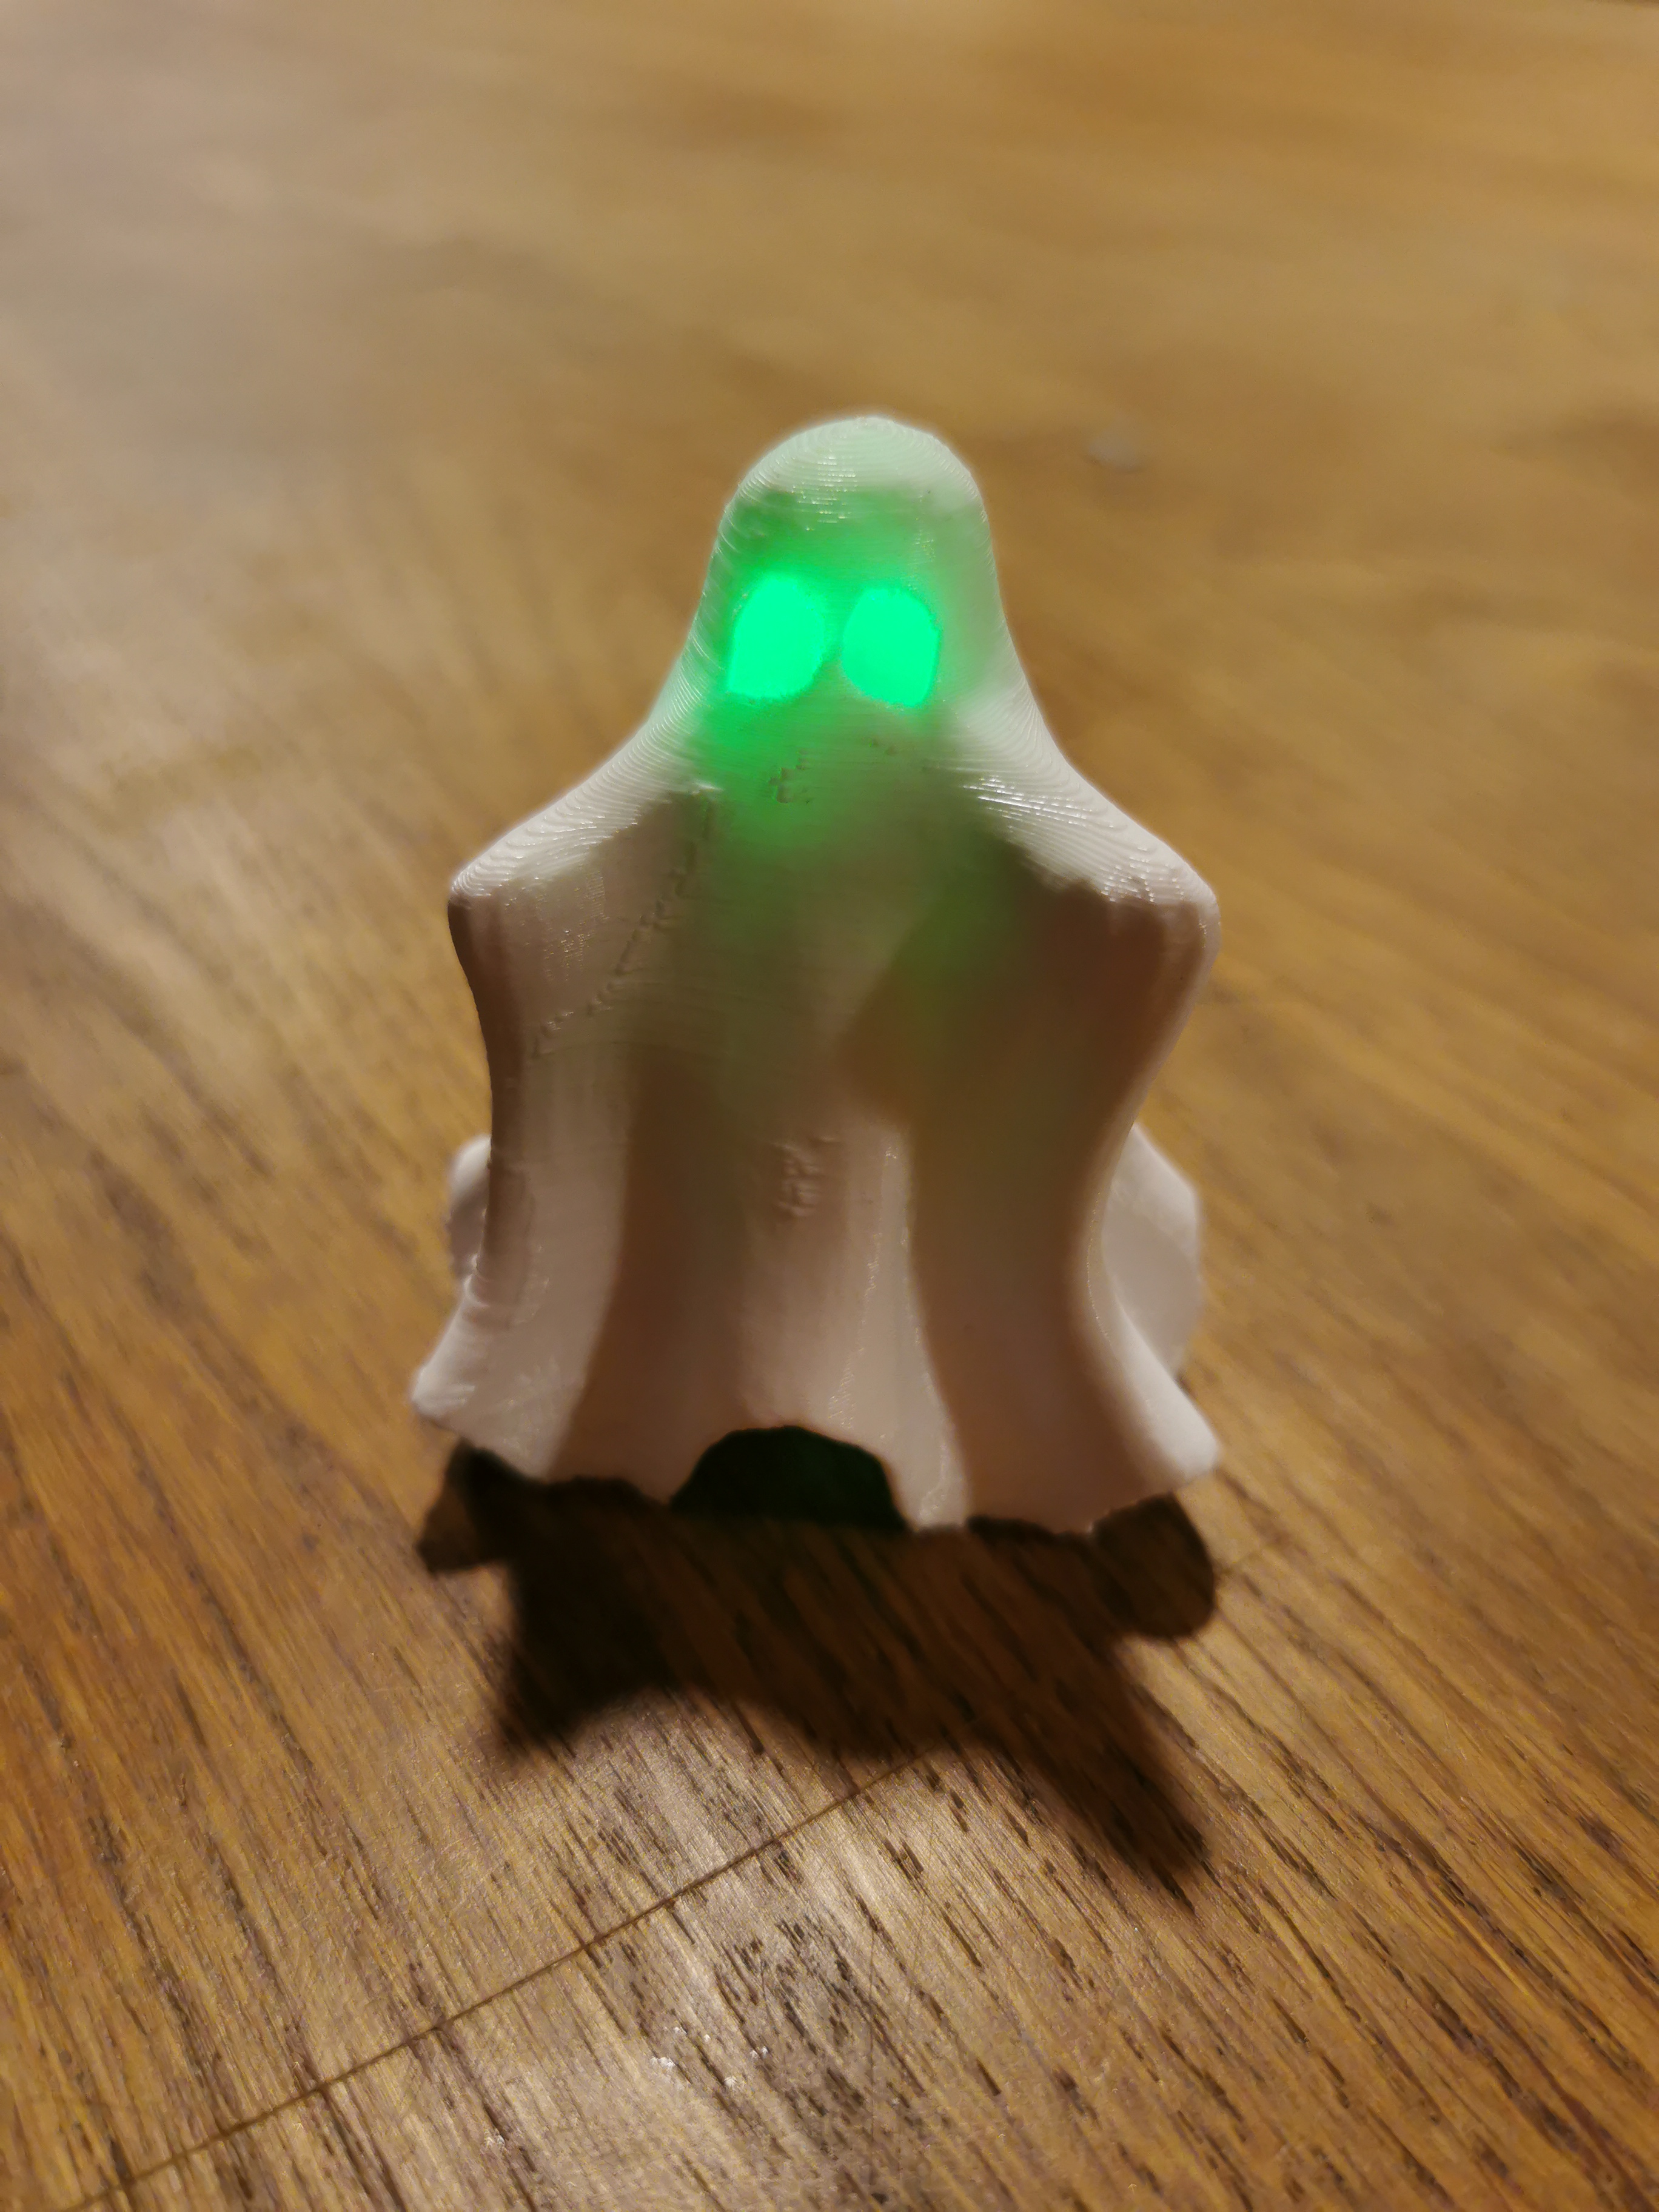
5) Test that the circuit works as expected.
The system should turn the LED on when it is dark and off when it is light. Cover the photoresistor / shine a light on it to test it.
Troubleshooting:
- Are all components connected correctly and with the correct orientation?
- Check all connections and soldering points to make sure there is no short circuit (incorrect connection)
- Bring your circuit to MAKE and ask for help
6) Glue the circuit to the ghost
Use hot glue to glue the protoboard to the inside of the ghost. Glue it to the back (inside) and the photoresistor to the front so that it is just hidden. The LED should be just below the eyes, so that it is hidden.
Either glue the battery holder or connect it with tape for easier change of battery.
You should now have a functioning ghost!
7) A bit about how the circuit works
It uses a transistor as a switch to turn on/off the LED. The transistor turns "on", allowing current to flow through it, when the voltage of the base is 0.7 V higher than the voltage at the emitter.
Using a voltage divider with the photoresistor the voltage at the base varies depending on the light level. Decreasing the light level increases the resistance of the photoresistor, which increases the voltage of the base. The other resistance R1 can be found using the equation R1=(27/7)*Rphotoresistor
You can measure the resistance of the photoresistor using a multimeter to adjust the circuit to trigger at different light levels.

For this ghost a resistance R1= 43 kΩ is a good value, which is created using two resistors in series.
R1 = 10 kΩ + 33kΩ = 43 kΩ